Showing posts with label so sew easy. Show all posts

Tuesday, January 20, 2015

On Safari in Denim and the January Monthly Stitch Denim Never Dies Challenge

Isn't it a good thing when a sewing year starts off like this? The Monthly Stitch theme is Denim never Dies, I have yards of various colors of denim in my stash and Deby needed a skirt pattern tested where denim was a perfect choice. I even had the color and length of zipper I needed AND all the interfacing. Now that is a good start to the sewing year when all your "sewing stars" align.
A lighter weight brushed denim has been around here quite a while. Originally the hope was a classic style denim shirt. I know they are in and out of style but I am 50 and don't care.
My love for the denim shirt stems from my childhood. My mother was accomplished at needlework. One fall she embroidered all over the fronts and backs of denim shirts for myself and my sister. Mine had the most wonderful southwest theme with cacti, horses, burros, and cowboys. My beautiful sister still has hers and can still wear it!
ajshirtback
frontembroideredshirt
Just love the pie on the cuff! I'm jealous because mine is long gone. But that is okay I have fond memories of my shirt and in particular remember how all the kids on the playground would gather round and ooo and ahhh over my beautiful shirt.
In January of this past year I had a goal of becoming a master at shirt making. That didn't happen in 2014 but it is back on my goal list for this year. One day, I will have my denim shirt and what the hay, I just might do a bit of embroidery on the back in memory of Mom.
But on to the great start to this year.  With my brushed denim ready to go I prepped Deby's pattern.  January was my one year anniversary as a pattern tester for Deby at So Sew Easy. As the year came to a close she sent us the most wonderful wardrobe builder, a sweet skirt with a fly front and flat felled seams.
upcloseflyfrontflatfellseamsI had sewn flat felled seams only a couple of times and never a fly front zip but as usual Deby made it very simple! Just love her easy to follow videos. I am not paid to say these things. All I do is test patterns. This one is easily my all time favorite, is well done and super easy, even if it does have some more advanced sewing techniques, and leaves you with a wonderful wardrobe staple that you can make in a variety of fabrics.
onsafariskirtExcited to make more of this skirt and happy about the great start to my sewing year! Now on to the Monthly Stitch February Challenge - my color is black.

Monday, December 8, 2014

Today I am a So Sew Easy Contributor ~ Yay!!


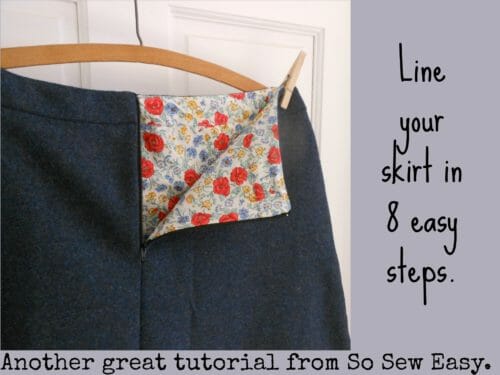
If your needing a simple lining tutorial for an Aline skirt, head over to So Sew Easy and check out How to Line a Skirt in 8 Easy Steps!

So excited to be a contributor for Deby. She has a ton of simple to sew patterns either free or for very little money. Many go together in a couple of hours or less and are nice basic pieces for your wardrobe.

See you over there!

P.S. Check out my Mason Jar cozy tutorial and come back tomorrow for a quick 4 patch potholder tutorial. Nice gifts...made in a Jiff!

Sunday, November 23, 2014

My favorite skirt pattern...the Show Some Flare Skirt from So Sew Easy

There is something real classy and timeless about an A line skirt. In my closet, aside from the occasional pencil skirt, it is all A line. They work well with my figure, are comfortable to wear and can be dressed up or down. Use to be that A lines were associated with fuddy duddy types and old grannies at Church but not any more. There are so many possibilities with this style skirt, the only limits, one's imagination.

Today, Deby at So Sew Easy launched a new pattern. The Show Some Flare Skirt. It is available for purchase here for a mere $4.95. This is a very simple pattern that can be sewn up in a few hours or less. There is a video as well as written instructions, both are very well done.


I love the way Deby has you sew the pockets. It is just so dang easy and she walks you through each step so you can spend your time on personal design details, like the contrasting pockets above, instead of trying to figure out how to sew it!


Most of the skirts I sew are lined. I just like them better that way and it is practical for me because of were we live. In a couple of weeks, I will be featured on Deby's site with an easy lining tutorial. Hope to see you there!


Tuesday, July 29, 2014

Color block, Monosew, Make A Garment A Month and Spandex.

Oh.My.Gosh.

I am in love with this pattern and spandex fabric! For now, I can't say too much about the pattern as it has not been released yet. Deby from So Sew Easy will be releasing the pattern on August 20th. I encourage you to prepare yourself and your fabric because YOU WILL LOVE IT and want to sew a gazillion of these dresses!

Only 4 pattern pieces and some thought put in to fabric choices and bam....a simple to sew stunning dress for a night out. Tone down your fabric choices and you have a great day wear dress that is very comfortable yet stylish. That is why we sew isn't it? For comfort, fit and style?

First attempt with a strip knit. Super comfortable and casual dress.
I first tried this pattern with a stripped knit I had bought at the resale store for 50 cents. Here is a secret; no one wants to buy the knits from a resale store because they frequently are out of style. This stripped knit is a perfect example. Hmmm...for 50 cents, they may be worth the risk. After sewing this version up, I saw the monosewn challenge for Monthly Stitch AND this month's Wardrobe Challenge with Angela Wolf was color blocking! Ooooooo....me thinks this could be one dress that fits two purposes, actually three if the Make A Garment A Month Challenge was included. Now off for some serious fabric shopping.

Enter: Spandex.

This was my first time ever purchasing or sewing with Spandex. While there were a few issues, wowsa, I love this stuff.

This fabric came from Girl Charlee and is soooo soft and drapey and fun. But, also slinky and slippery as all get out! I had to overcome a few issues and it took a long time for me to cut the pieces out because the back middle seam had to be removed and that pattern piece altered. There was no way I was going to be able to match the fabric pattern on that back seam. Altering that piece and the nature of the fabric itself also caused a bit of issue with the hemline.

Removed the back middle seam.

Still amazed the hem turned out. Yikes, it was a mess.
Another issue I had with my first attempt was a gaping neckline, I guess a common problem when sewing knits. You can see a bit of that in the first picture of this post. With some research I was able to get a solution that will work on future knit projects as well.

Flat neckline! Yippee!
I did end up spending some time online, looking up knit fabric techniques and in particular spandex.  I also started a knit notebook to store my new knowledge because well....let's just say my memory is not what it use to be.

Here are a couple of tips that really helped:

1. Pin, pin, and more pins. I pined A LOT. This helped to stabilize the fabric when sewing my side seams and the front and back panels to the center pieces.

2. Stay tape. I wish I had thought to stay tape my shoulder seams but due to the design of the dress and how it fits me, there isn't too much stress on the shoulders...I'll probably be okay. I do have a bit of wiggle room under the arms so am thinking I might redo the shoulders. However, in the future, I will definitely use stay tape at the shoulder seams.

3. Stay tape.:) I did use stay tape around the armscye and at the neckline to prevent those areas from stretching and gaping when being sewn. Here and here are great articles on how to prevent neckline stretch. I used 1/4" double sided tape, laid it down around the armscye and neckline, peeled the backing off and folded over the fabric. This helped in two major areas....completely stabilized the fabric so no stretch and gave me a nice clean line to sew beside. I did not worry about finishing my seams, just trimmed them close to stitching. Spandex fabric does not fray.

4. Use a double needle. I had a lot of "firsts" with this project and a double needle was one of them. That double needle had been in my sewing box for almost a year and I had never tried it. Well, I will probably never sew another knit without one! It worked perfectly on the spandex and produced a beautiful finish with much less fuss than a single needle.

5. Stay tape. :) :) This time on the hemline. This was the hardest part of sewing the entire dress due to my pattern alterations mentioned above. Also, when the seams where sewn there was some creeping of the fabric and, just cutting the fabric out; the slightest movement and the spandex would shift some.

6. Next time I will probably try a rotary cutter and mat to cut pattern pieces. Cutting the spandex with scissors just wasn't that great. Pain in the keester!!

All and all this was a great sewing project. So much was learned about prepping and sewing with spandex and knits in general and also I learned a few things about using my sewing machine and the double needle.

The biggest benefit though is this great little dress I now have that I don't want to take off and as mentioned before, that's why we sew right....comfort, fit and style?

xoxo.


P.S. Many thanks to Deby for agreeing to let me post this before her pattern release!

Thursday, May 29, 2014

Carry the Clutch Girls.


"I've always loved when girls carry their wallets as a clutch instead of a bag."

Alexander Wang

The beginning of my clutch stash.
There are so many wonderful things about a clutch purse aren't there? So convenient and easy to carry. Perfect when you don't want to carry the kitchen sink. Versatile. Light. And if you are the slightest bit crafty you can own a million zillion in all the glorious colors of the universe and in every style imaginable.

Over the past weeks, I have become a lover of clutches for all the reasons above and then some. One major reason is So Sew Easy's Clutch pattern. It is somewhat rare to find a purse pattern this user friendly yet so amazingly easy to hack. The only limitation here: one's imagination. Fabric choices, interfacings, embellishments, closures, to strap or not to strap, and size; all can be changed up, customized, coutured to your very own loves.

Deby at So Sew Easy really does make it....well....easy!! And somewhat lucrative as she is hosting a clutch contest with lots and lots of prizes including a side bar link on her highly trafficked website to the winning blogger . Although, this post is somewhat late in the contest, it closes tomorrow, one could STILL easily enter because these clutches can be sewn very quickly. Heck, by midnight tomorrow, one could sew about 25! Ha, one a hour as of this post! Probably not likely, but you get the idea of how friendly this pattern truly is!

The first time I printed off the pattern, I forgot to tile and got a smaller pattern. I decided to use it to make my first clutch for practice. With a sweet pink linen on which I embroidered a small motif, some pretty purple satin for lining and a quality snap, I ended up with the small jewel pictured at the bottom here:

Small pink clutch perfect for lipstick, jewelry, other odds and ends.
For the contest entry something a little more dressy and an opportunity to attempt a new sewing skill seemed in order. The flap on this pattern just begs for embellishment so beads it was! 

Beaded flap. This was so much fun! Can't wait to put beads on a skirt!!

It just so happens our little town has a sweet bead shop. While there, a beading jewelry fiend help me choose beads and gave great encouragement. Beading is not that hard! There are a few good tutorials on youtube and some articles. But I actually was surprised by the lack of beading instruction out there. Basically, it seems you have to buy a book. However, with good quality nylon thread, quilt batting or repurposed felted wool, a good sharp needle with a tiny tiny shaft and head (a pain for someone who is past 45) but necessary to get the small seed beads on, one can be off and running. Once going, things went quickly. 

Some beading tips: 
1. Set yourself up completely with a; flat tray to pour your beads on, the beads, extra needle, thread, and scissors. Also in the future I will probably get one of those hand needle threaders as one of the teens had to be called upon to thread the needle a couple of times.
2. Make sure you are not rushed. I actually found this process to be very relaxing. It was a joy to see the bead designs take shape.
3. Anchor your thread each time you take new thread. Double your thread, come up through the fabric from the back, go back down very close to initial hole, run the needle and thread through the middle of your double thread and then pull tight. Anchoring ensures your beads do not come lose.
4. Frequently check your work on the back to make sure you have pulled all the thread through. A couple of times I had to start over with a design because I did not pull my thread all the way through which means loose beads on the front.
5. Tie off securely. As if the zombie apocalypse is here. All of your work on the back is hidden by the lining for the clutch so it is okay to leave a bit of knots etc...on the back of your work.

To finish off my clutch it needed a special lining. Some time ago I purchased a small amount of raw silk from fabricandart.com. They have the most amazing selection of silks there and this one was no exception. Golden in color it was the perfect finish to my special clutch.

In person, this fabric has the most amazing sheen.
I am delighted with the finished product and am very happy that Deby shared her pattern and hosted this great clutch contest! Thank you Deby!


Love!


Sunday, March 30, 2014

Lovely Little Linen n' Lace


Claiming her Meringue clutch.
Things have been happening here. And they don't have anything to do with sewing; which makes me a crumpy person. There have been Debate tournaments, music recitals, road trips to do college things, car repairs, work (necessary, I suppose) and general life event things that require attendance (this one is ok). NOT MUCH SEWING.

But, finally, this past week I had 6 days off in a row. Whoohoo!!! Let's sew!!!

I thought anyway, but amazingly very little has been accomplished. Almost an entire day was spent trying to figure out how to make a mini sawtooth star quilt pattern when what I should have done first thing was google it. Because, guess what?? Someone has ALREADY come up with that pattern. Of coarse they have. Quilting is a mature industry for sure and there aren't too many surprises out there. Yes, new variations on patterns, yes, the trend of "modern quilting", yes, occasionally new techniques, and yes, lots and lots of new fabrics always.

Sawtooth Star Quilt Block
The beautiful Sawtooth Star Pattern.
But you can be assured when it comes to something like the sawtooth which is an OLD quilt pattern, well, pretty much every aspect of that pattern has been thought about and given the once over by someone! No need to reinvent the wheel. So, memo to self...don't waste time and fabric trying to come up with a pattern for a certain size block because someone already has (or come close anyways).

Another day was spent on the Gabriola skirt SAL from Sewaholic. Because the pattern requires 5 yards (yes, it's true, 5) of fabric, I made a muslin from a .49 resale fabric. Thank goodness, I did. My muslin had/has some issues. What should have been a quick sew of a great maxi is now lingering in my sewing room. Meanwhile...tick, tick, March is coming to a close and my Big City Bag for March was not done!

It is a good thing this month's bag was an easy one! The Meringue Clutch.

From: Mommy's Naptime as featured in Sara's book.

Yes, even in my sewing slump, I was able to finish the Meringue Clutch! I have learned quite a bit about bag making in the last couple of months. Between Sewing with Squeak's Big City Bag SAL and Deby's Carry All Bag, the opportunity to work with various interfacings, bag hardware, and bag making techniques has been ample.

This Clutch design just speaks summer to me so I wanted something soft and summery. Linen and Lace! I used pure white linen and a vintage piece of cotton lace I've had since my 20's. Trust me, it's vintage. :) I opted to use a medium weight interfacing and skipped the interfacing all together for the strap. Also, after seeing a few comments about the gathered panel that was used I decided to only cut my to 20" instead of 24". I did not want the lace pattern to be lost in the gathers. I also didn't topstitch near the zipper. Call me a rebel.

Really like the shape and size of this clutch.

Cotton lace which my Mom gave me eons ago.

So pure and white, it is my opinion that linen is one of the most beautiful fabrics available.
 Anyway, I am quite pleased with how the bag turned out. One of the great things about Sara's bag patterns is they finish to very generous sizes, even this clutch. My daughter promptly claimed the clutch. Happier now.