Tuesday, January 20, 2015

On Safari in Denim and the January Monthly Stitch Denim Never Dies Challenge

Isn't it a good thing when a sewing year starts off like this? The Monthly Stitch theme is Denim never Dies, I have yards of various colors of denim in my stash and Deby needed a skirt pattern tested where denim was a perfect choice. I even had the color and length of zipper I needed AND all the interfacing. Now that is a good start to the sewing year when all your "sewing stars" align.
A lighter weight brushed denim has been around here quite a while. Originally the hope was a classic style denim shirt. I know they are in and out of style but I am 50 and don't care.
My love for the denim shirt stems from my childhood. My mother was accomplished at needlework. One fall she embroidered all over the fronts and backs of denim shirts for myself and my sister. Mine had the most wonderful southwest theme with cacti, horses, burros, and cowboys. My beautiful sister still has hers and can still wear it!
ajshirtback
frontembroideredshirt
Just love the pie on the cuff! I'm jealous because mine is long gone. But that is okay I have fond memories of my shirt and in particular remember how all the kids on the playground would gather round and ooo and ahhh over my beautiful shirt.
In January of this past year I had a goal of becoming a master at shirt making. That didn't happen in 2014 but it is back on my goal list for this year. One day, I will have my denim shirt and what the hay, I just might do a bit of embroidery on the back in memory of Mom.
But on to the great start to this year.  With my brushed denim ready to go I prepped Deby's pattern.  January was my one year anniversary as a pattern tester for Deby at So Sew Easy. As the year came to a close she sent us the most wonderful wardrobe builder, a sweet skirt with a fly front and flat felled seams.
upcloseflyfrontflatfellseamsI had sewn flat felled seams only a couple of times and never a fly front zip but as usual Deby made it very simple! Just love her easy to follow videos. I am not paid to say these things. All I do is test patterns. This one is easily my all time favorite, is well done and super easy, even if it does have some more advanced sewing techniques, and leaves you with a wonderful wardrobe staple that you can make in a variety of fabrics.
onsafariskirtExcited to make more of this skirt and happy about the great start to my sewing year! Now on to the Monthly Stitch February Challenge - my color is black.

Friday, January 2, 2015

Mission Possible: Bust the Stash 2015

Around the middle of October of 2014 I literally spent hours looking for a particular piece of fabric that I knew I had. HOURS. Eventually I found it but by that time was so frustrated I didn't even want to sew the project that had started the search. I sat down to think about things and remembered how I had started 2014 with the intention of getting rid of my stash and being able to refresh (translate: buy) new fabric at the end of the year but only for the project it was immediately intended for.  Frankly I had made little progress. Worse than no progress on the stashbusting, I had added to it!

But how did that happen? I thought back and could only think of three times when I had purposely purchased fabric for a "right now" project. The rest had been impulse buys. All those pretties in the Hawthorne Threads newsletter, Instagram is the enemy when you are following Art Gallery Fabrics, Fat Quarter Shop or the like, Mood Fabrics (dang them for their beautiful designer fabric deals), the mounds of vintage fabric at our local Antique Mall, the Craigslist ads, the resale store, the blah, blah, blah. Then the facebook (fb) flashback.

In the middle of last year when I was suppose to be busting not buying I was pretty active in a fb group where people post their fabric for sale. When I say active, I don't mean I was selling. I bought over $250 of fabric that I did not need or research the details of very well and truthfully will have a hard time finding a way to use it. It is not fabric that I would ever ever buy from a fabric store if I could see and touch it! And I paid way too much per yard...more than I could have at say JoAnn's with a good coupon.  People, heed my warning: when you are buying fabric on fb from sketchy individuals across the country from you, you just might have a problem. 

Oh... I was so low... down and out about my sewing; facing all these facts about my stash habit but out of it all realized something important. A huge fabric stash has been a real negative for me and actually kills my creativity and my desire to sew.

And I think I know why....

Stash reminds me of projects I intended to do but never did start;

Stash is money I spent for no immediate return;

Stash falls out of fashion especially in the quilting world where daily new lines of fabric are being introduced by a multitude of fabric companies;

Stash can't really be used for the type of sewing I like to do, i.e. huge floral prints from the 80's don't look so good on 5'2" middle aged women;

Stash makes choosing a good fabric for the project more difficult for me. There are too many options or possibilities. What if it doesn't look good when I'm done and then it is.....horror......wasted? This one is almost paralyzing at times because by nature I am a perfectionist. For me, the stash facilitates my tendency to procrastinate because "what if I get it wrong"?

Just looking at my stash became unpleasant. So I determined at the moment that from then, the middle of October until December 2015, I was going to sew, sell, give or donate my stash with the exception of some select pieces of high quality wools, silks and flannels if they had not been used. 

I boxed up all the fabric in my sewing room except for the fabric I would be using in the next several weeks. I sighed up for a craft show and sewed over 20 yards preparing for the show. I made a boatload of small Christmas gifts and gave them to pretty much anyone I knew. I just spent a lot of time sewing, some of which turned out awful, but by the end of December I had sewn through almost 40 yards!

Guess what? I can't even tell the difference. S-E-R-I-O-U-S. Did not put a dent in things, but that is okay. It will happen. Just like it took 20 plus years to get here, it will take some time to get out. Yesterday, I combined some totes and actually have an empty one. 40 plus large totes to go but...IT WILL GO.

Next week sees the launch of the Stashbusting 2015 group on fb. This will ultimately be a closed group but right now anyone who commits to Bustin' the Stash can join through the end of January and possibly beyond dependin'.  If it sounds a little like a support group, well, I suppose it is. There will be themes and bustin' counts and good folks. In February, here on this blog, I host the theme which will be announced soon.

It is a delight for me to a part of Stashbusting 2015 and I hope you join us (if you feel the need to...)

xoxo


Tuesday, December 9, 2014

Sew a quick 4 patch potholder. Gift in a Jiff #2.

The 4 patch potholder is such a simple gift to sew up. In 30 minutes or less you can have a sweet handmade hostess or teacher gift. These also make wonderful exchange gifts and are a great gift for colleagues.

Supplies needed:
For 1 potholder you will need:
Fabric A – (2) 8” squares
Fabric B – (2) 8” squares
(1) 8” square of A OR B (your choice) for backing
(1) 8” square of Insul-Bright
Thread to match
Walking foot (not completely necessary but nice to have)
Sewing Machine

Get your fabrics and Insul-Bright together and cut your 8" squares. One of the beauties of this gift is seasonal fabric can be used such as the Christmas fabric below.
Fold 2 squares from both fabric A and B in half wrong sides together. Press.

On your work surface place your 8” square of Insul-Bright shiny side up. Place your 8” piece of backing fabric on top of the Insul-Bright right side up.

Next get your 4 folded and pressed (now) rectangles.  Position one Fabric A rectangle on top of the backing along the top edge. Make sure you match raw edge to raw edge. The folded edge should be in the center of your backing square.
Moving to the right side of your square place one folded Fabric B rectangle on top of the one you have already placed matching raw edges to raw edges on your 8” square. Flip up the Fabric A folded rectangle at the top right and place half of Fabric B rectangle underneath.
Move to the bottom of your square placing your last Fabric A rectangle on your 8” square. Flip up the bottom of the Fabric B you just positioned and place your A piece underneath so that half is covered and other half is showing.
Continue to the left side of your square using remaining fabric piece and flipping up bottom piece end to position underneath. Don't forget raw edges together!

Matching fabrics should end up in opposite corners.

When your done, it should look like the above picture. Make sure all your raw edges are together and that a raw edge is not in the middle!
Pin everything in place. Beginning about 2 inches down from one corner, stitch all the way around your 8” square using a generous 1/4 inch seam. There is no need to leave an opening for turning. Clip corners and threads.


Turn right side out using the opening that was made in the middle by the 4 pieces coming together in the middle.

Set your machine to any decorative stitch or to a small zigzag if you don’t have a decorative stitch. Stitch about 3/4 inches long across the middle of the potholder over the opening you used to turn.  This will ensure the middle does not gap open.
If you want to add to the gift, in one of the "pockets" place a wooden spoon and tea or hot cocoa packets.


And that is that! A Gift in a Jiff #2!

Monday, December 8, 2014

Today I am a So Sew Easy Contributor ~ Yay!!


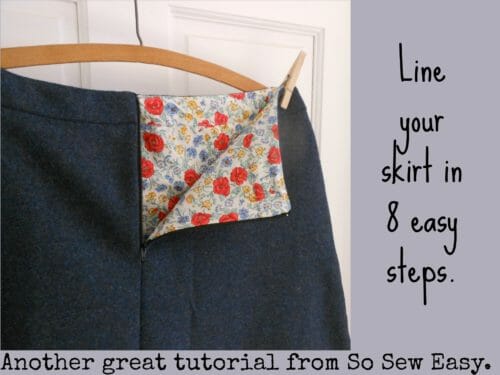
If your needing a simple lining tutorial for an Aline skirt, head over to So Sew Easy and check out How to Line a Skirt in 8 Easy Steps!

So excited to be a contributor for Deby. She has a ton of simple to sew patterns either free or for very little money. Many go together in a couple of hours or less and are nice basic pieces for your wardrobe.

See you over there!

P.S. Check out my Mason Jar cozy tutorial and come back tomorrow for a quick 4 patch potholder tutorial. Nice gifts...made in a Jiff!

Sunday, December 7, 2014

Sew a Gift...in a Jiff ~ A Mason Jar, a Cozy and Homemade Hot Cocoa Mix.


Looking for a super simple gift that can be completed in less than one hour? 

How about a quart Mason Jar filled with yummies and "dressed" in a pretty cozy. All you need to do is sew your cozy and fill the jar with a homemade cookie or soup mix, candy, spiced tea or in this case, a delicious homemade hot cocoa mix and you have a perfect hostess or teacher gift that will be appreciated on long winter nights.

This is a great scrap buster and really can be custom made for any ol' jar you want. With just 2 measurements you can be off and running with a beautiful custom cozy to keep or give. 


Make the cozy-

Supplies Needed:
Main fabric - Scrap of fabric roughly 4 to 5” wide by 14 - 15” long. It can be any weight fabric but if you will be using lightweight cotton it is suggested you interface the fabric. I used light to midweight repurposed wool.  Nice wool for smaller projects like this can easily be repurposed from old skirts, shirts, sweaters, blankets and even coats.  Wool adds a nice rustic element to craft projects. Below are some wool scraps I have stashed over the past couple of years. These came from Pendleton skirts and shirts, men's sweaters and the top dark grey is from a wool coat made in Russia.

Other supplies needed:
Lining fabric – 4 to 5” wide by 14-15” long. For my lining fabric I used scraps from a sheet I had used to make a muslin.
Button - repurposed from an old coat
Elastic Hair Tie
Thread
1/4 inch piecing foot if you have it
Sewing Machine

Measure your jar around the middle. Mine measured 12 1/4 inches around. Yours may vary some. Reduce this measurement by 1/2 inch or so. It is up to you how much space you want to leave for your closure.
In the middle of the jar take a vertical measurement. I just measured roughly where I wanted the cozy to begin and end. Roughly 4" for me.

My final cutting measurements were 4 inches wide by 11 3/4 inches long.

Interface your lining if you have chosen a lighter weight fabric.

Place your two fabrics right side together, pin. Sew a 1/4 inch seam around all 4 sides. Leave a 2-3 inch opening at one short end for turning purposes.
Clip corners and trim seams. Turn right side out. Fold your opening seams to inside the opening hole and press the entire piece well. Take your elastic band and give it a twist. This will make it tons easier to sew in to the opening. 
Place the elastic band partially in to the opening. 

Beginning near the opening and elastic band stitch a top stitch all around the cozy. Backstitch several times over the elastic band to ensure it is secure. Press.
On the opposite short end sew a button. Wrap around your Mason Jar and secure using elastic hair tie and button. On a small scrap of paper write out the preparation directions and affix to your jar. I attached mine using the closure but you could put those on the top as well.

Fill Mason Jar with Homemade hot cocoa mix for an easy wonderful gift.

Homemade Hot Cocoa Mix:
This makes enough to fill 2 quart jars plus you will have a bit left over so you can enjoy a cup of cocoa while you are sewing!
Homemade Hot Cocoa Mix in a Jar:
4 cups powdered milk
2 cups vanilla flavored powdered creamer OR plain coffee creamer
2 cups of powdered sugar (can use granulated but powdered dissolves quicker and easier)
1 cup plus 2T cocoa powder (Hersey's Special Dark makes a richer hot chocolate)
** If you want to add a bit of zest to your mix, add 1 t. cinnamon and 1/4 t. chili powder
1-2 cups Miniature Marshmallows depending on amount desired

In a large bowl stir together powdered milk, creamer ,sugar and cocoa (add spices if desired).  Add desired amount of miniature Marshmallows. Spoon or carefully pour in to Mason jar. Seal. Wrap your cozy around jar and include preparation instructions.

Preparation instructions:
Measure 1/2 cup cocoa mix into mug. Stir in 1 cup hot water..Makes 12 servings.


And that is it! Now you have a sweet homemade gift for someone special.

Recipe is adapted from meals.com and can be found here: http://www.meals.com/recipe/hot-cocoa-mix-in-a-jar-32261?retry=true


Sunday, November 23, 2014

Be my1000th Pinterest follower and win a prize!

Thanks Rhonda who is my 1000th follower!


It took me years to get on Pinterest. I just resisted, not even really sure why. But last January I wanted to participate in a Wardrobe Challenge and needed a Pinterest board. It was then that I began to see the amazing amount of information that was available and so easily accessible with a Pinterest account. So began my Pinterest love in earnest.

Today I have 999 followers.  Be the 1000th and win this vintage Vogue Pattern Book from 1970!


If you are the 1000th send me an email to: stoneylonesomesewworks at gmail dot com or just post a comment below and I will contact you.

Good luck and happy Pinning!!

My favorite skirt pattern...the Show Some Flare Skirt from So Sew Easy

There is something real classy and timeless about an A line skirt. In my closet, aside from the occasional pencil skirt, it is all A line. They work well with my figure, are comfortable to wear and can be dressed up or down. Use to be that A lines were associated with fuddy duddy types and old grannies at Church but not any more. There are so many possibilities with this style skirt, the only limits, one's imagination.

Today, Deby at So Sew Easy launched a new pattern. The Show Some Flare Skirt. It is available for purchase here for a mere $4.95. This is a very simple pattern that can be sewn up in a few hours or less. There is a video as well as written instructions, both are very well done.


I love the way Deby has you sew the pockets. It is just so dang easy and she walks you through each step so you can spend your time on personal design details, like the contrasting pockets above, instead of trying to figure out how to sew it!


Most of the skirts I sew are lined. I just like them better that way and it is practical for me because of were we live. In a couple of weeks, I will be featured on Deby's site with an easy lining tutorial. Hope to see you there!


Wednesday, July 30, 2014

Ode to the Feedsack....The Lucky Denver Mint Bag


My Lucky Denver!

Ok...it is almost 1 am so this is gonna be short. The Lucky Denver Mint Bag is complete and just under the wire too! I actually was going to make this post in the morning but luckily went to Angela's blog to confirm what time the Big City Bag Monthly linky party closes....oops in just 6 hours! Every month Angela hosts a linky party and we sew a bag from Sara Lawson's Big City Bags book.


The month of July was The Lucky Denver Mint Bag which is what my friend would definitely call a "feed sack" bag. She always hated them! Well, I happen to love a "feed sack" style handbag. I don't like to carry huge bags (like my friend does) and this is one great thing the "feed sack" has going for it. Just enough room for my normal stuff with maybe a bit to spare.

I found this graphic which shows the different types of bags and what they call a "feed bag". But in my opinion their's is not quite right.

Almost...but not quite right.
This bag, the Lucky Denver Mint Bag seems to be designed for simple practicality. So, from the beginning, I liked the bag design.
 
From Sara's book.
The Lucky Denver went together for me faster and easier than the bags we have sewn before. It was an easier pattern with less cutting but I think I am getting better! This bag turned out smaller than I thought but partially because I made a cutting error that took some correction. Still, big enough for me.

Just right size wise for my needs!
A sweet vintage floral print was used for the lining. Both fabrics have been in my stash for a while so another reason I love this bag, was able to do some stash busting!  (I actually made a skirt to match this bag out of the same two fabrics, will try to post pics later.)

Helloooo downthere!

Thanks Angela for hosting another month of the Big City Bags SAL. And good luck to everyone!

Update: I just read Betsy's post here. She mentions a couple things that I definitely noticed as well. One the bag handles are too short! And here's kind of a weird thing about that....why don't the bag handles look short in the picture in the book??? Man, they have some real tricks of photography in that book...that is all I can figure. Also, pocket design. Too far down in the bag. They need to come up a inch or two. Perhaps a zippered pocket would be a positive.

Since this bag came together so quick, I can definitely see myself making it again, maybe with a nice lightweight wool that has some embroidery. When I do, I will know what needs to be changed. Till then it's me and Lucky D!


Tuesday, July 29, 2014

Color block, Monosew, Make A Garment A Month and Spandex.

Oh.My.Gosh.

I am in love with this pattern and spandex fabric! For now, I can't say too much about the pattern as it has not been released yet. Deby from So Sew Easy will be releasing the pattern on August 20th. I encourage you to prepare yourself and your fabric because YOU WILL LOVE IT and want to sew a gazillion of these dresses!

Only 4 pattern pieces and some thought put in to fabric choices and bam....a simple to sew stunning dress for a night out. Tone down your fabric choices and you have a great day wear dress that is very comfortable yet stylish. That is why we sew isn't it? For comfort, fit and style?

First attempt with a strip knit. Super comfortable and casual dress.
I first tried this pattern with a stripped knit I had bought at the resale store for 50 cents. Here is a secret; no one wants to buy the knits from a resale store because they frequently are out of style. This stripped knit is a perfect example. Hmmm...for 50 cents, they may be worth the risk. After sewing this version up, I saw the monosewn challenge for Monthly Stitch AND this month's Wardrobe Challenge with Angela Wolf was color blocking! Ooooooo....me thinks this could be one dress that fits two purposes, actually three if the Make A Garment A Month Challenge was included. Now off for some serious fabric shopping.

Enter: Spandex.

This was my first time ever purchasing or sewing with Spandex. While there were a few issues, wowsa, I love this stuff.

This fabric came from Girl Charlee and is soooo soft and drapey and fun. But, also slinky and slippery as all get out! I had to overcome a few issues and it took a long time for me to cut the pieces out because the back middle seam had to be removed and that pattern piece altered. There was no way I was going to be able to match the fabric pattern on that back seam. Altering that piece and the nature of the fabric itself also caused a bit of issue with the hemline.

Removed the back middle seam.

Still amazed the hem turned out. Yikes, it was a mess.
Another issue I had with my first attempt was a gaping neckline, I guess a common problem when sewing knits. You can see a bit of that in the first picture of this post. With some research I was able to get a solution that will work on future knit projects as well.

Flat neckline! Yippee!
I did end up spending some time online, looking up knit fabric techniques and in particular spandex.  I also started a knit notebook to store my new knowledge because well....let's just say my memory is not what it use to be.

Here are a couple of tips that really helped:

1. Pin, pin, and more pins. I pined A LOT. This helped to stabilize the fabric when sewing my side seams and the front and back panels to the center pieces.

2. Stay tape. I wish I had thought to stay tape my shoulder seams but due to the design of the dress and how it fits me, there isn't too much stress on the shoulders...I'll probably be okay. I do have a bit of wiggle room under the arms so am thinking I might redo the shoulders. However, in the future, I will definitely use stay tape at the shoulder seams.

3. Stay tape.:) I did use stay tape around the armscye and at the neckline to prevent those areas from stretching and gaping when being sewn. Here and here are great articles on how to prevent neckline stretch. I used 1/4" double sided tape, laid it down around the armscye and neckline, peeled the backing off and folded over the fabric. This helped in two major areas....completely stabilized the fabric so no stretch and gave me a nice clean line to sew beside. I did not worry about finishing my seams, just trimmed them close to stitching. Spandex fabric does not fray.

4. Use a double needle. I had a lot of "firsts" with this project and a double needle was one of them. That double needle had been in my sewing box for almost a year and I had never tried it. Well, I will probably never sew another knit without one! It worked perfectly on the spandex and produced a beautiful finish with much less fuss than a single needle.

5. Stay tape. :) :) This time on the hemline. This was the hardest part of sewing the entire dress due to my pattern alterations mentioned above. Also, when the seams where sewn there was some creeping of the fabric and, just cutting the fabric out; the slightest movement and the spandex would shift some.

6. Next time I will probably try a rotary cutter and mat to cut pattern pieces. Cutting the spandex with scissors just wasn't that great. Pain in the keester!!

All and all this was a great sewing project. So much was learned about prepping and sewing with spandex and knits in general and also I learned a few things about using my sewing machine and the double needle.

The biggest benefit though is this great little dress I now have that I don't want to take off and as mentioned before, that's why we sew right....comfort, fit and style?

xoxo.


P.S. Many thanks to Deby for agreeing to let me post this before her pattern release!

Monday, July 28, 2014

A scrappy little tea wallet.

Monthly Linky Party
Back when the year was fresh, I made a lot of sewing commitments. Not really New Year's Resolutions but like that. The remnants of some of those commitments are on the sidebar of this blog. But there were more that never made it to the sidebar. At the time, one of my sewing buddies said "you are going to be VERY busy". Yes. Busy.

Things held together pretty well during the winter months but then spring, our son's wedding, another son decided to swim competitively, our daughter and college visits, chores, chores, and more chores outside. And well, there you have it. I have not been very "busy" with sewing but have been plenty busy.

The one thing that has sorta been kept up is the monthly Craft Book SAL with Live.Love.Create. I say sorta because although I've had the projects done, I haven't been able to post a blog about them or to upload them to Kelly's monthly linky party.

Well, this month I have the project done, the pictures ready and am writing this post with plenty of spare time! Happy times!!

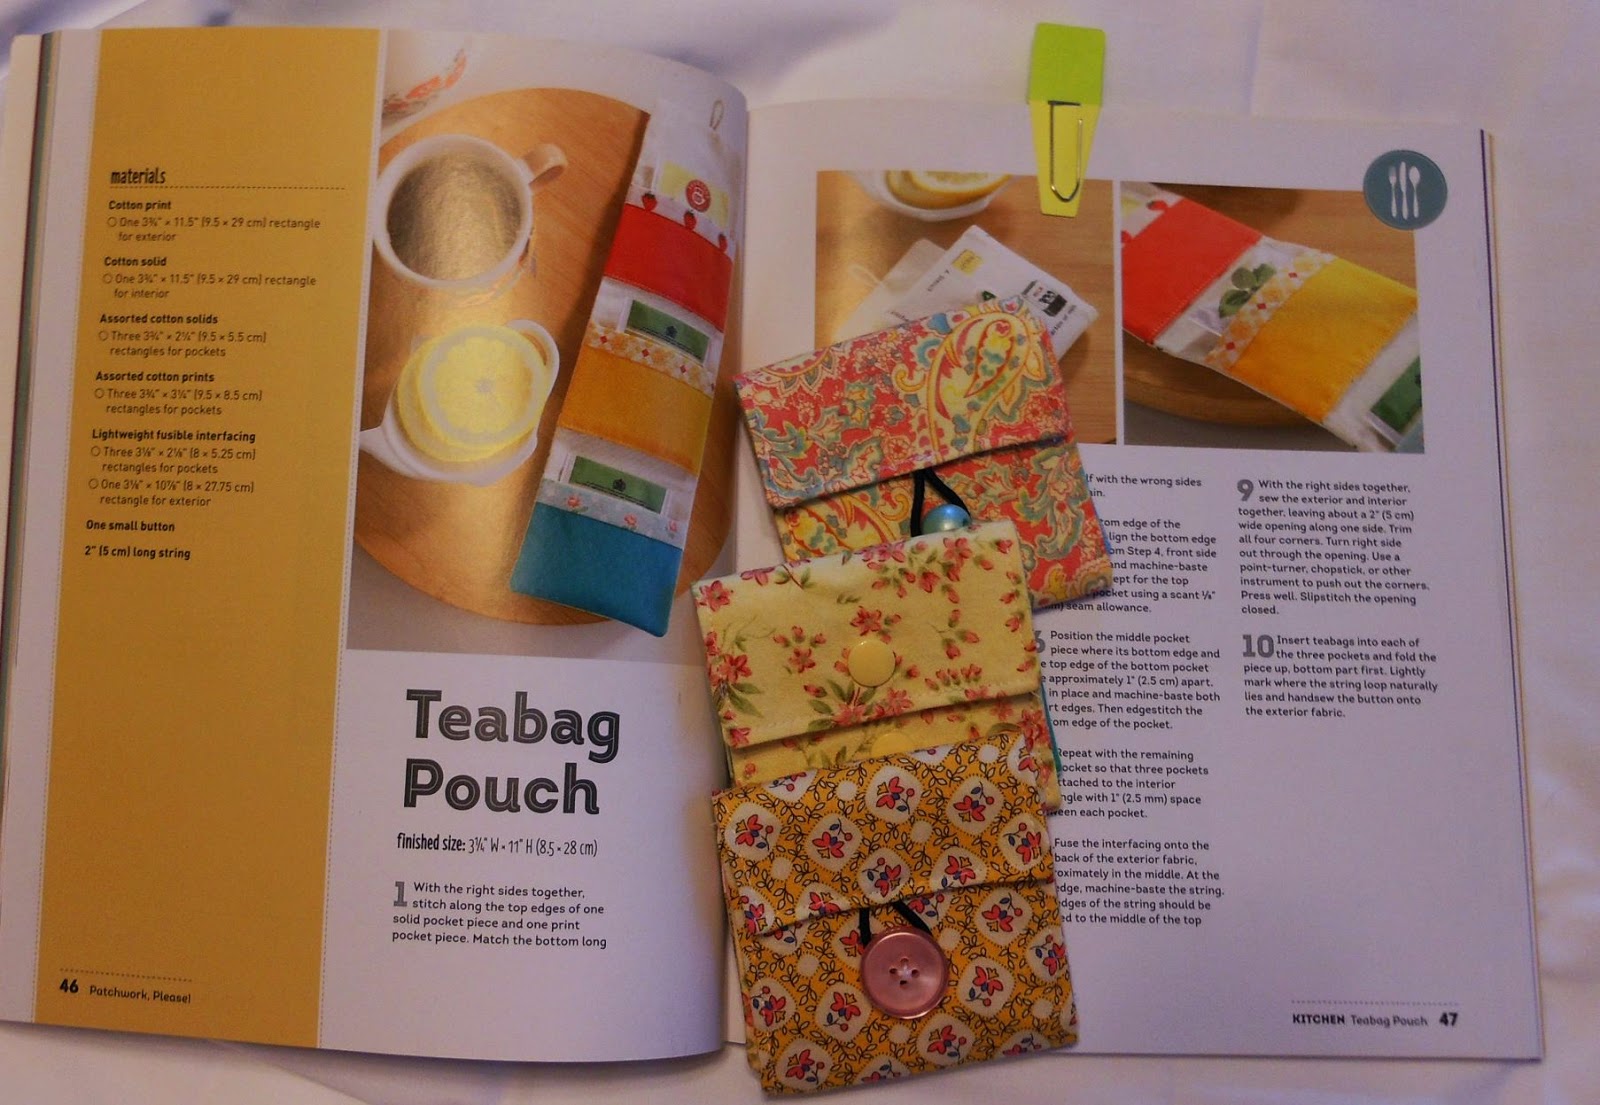
The craft book chosen is actually the book I won in January from the SAL in the random drawing Kelly does each month for the prize; Patchwork Please! Actually, this is one craft book that I have been using. I have made several items from the book and have enjoyed them all.


For this month,  these sweet tea wallets from some scraps on my sewing table were calling to me. Just like most (all) of you, I am not quite sure what to do with all those scraps but can't quite throw them away. These wallets are perfect for that problem. What a delightful teacher gift these would make!!

Super cute projects in this craft book!
Dainty little prints for the wallets.


Any color combination will do nicely!

A dear friend of mine has a lovely Tea shop in a nearby town. This month I took a few of these little wallets to sell through her shop. It is the first time I will get paid for sewing. I really can't decide if it's a good thing, PRESSURE as everything must be perfect when you are selling something! My husband says Yes! :)

But in any case, I have this wonderful July finish, humble as it is!! And that my sewing friends, FEELS GOOD!


Monday, June 23, 2014

Easy Breezy......really!!

The Easy Breezy Blouse by So Sew Easy

In the past I frequently bemoaned the lack of summer wardrobe available in my closet. Truthfully, I have way more winter clothes than summer. Not sure why because where we live there is plenty of summer and lots of time to wear those gauzy, sleeveless, woven tops. Many times I have purchased lovely spring, summertime and early fall prints which I later planned to turn into luscious summertime wear. Except for that last part, where I actually make something with all those wonderful fabrics!

But, those days are over. This year already, I have made 3 summer tops. One of them, the one above, was sewn in less than a hour using an embroidered gauze that has been stored away for a while. Those three tops are seeing a lot of wear, especially the Easy Breezy, which spends its time either on me or in the wash.

Deby always does a good job with making patterns simple and easy to use. Most of the them have a video which is very thorough and provides a good visual aid if you are having trouble with any step.

Now there is no reason to put off making sweet summertime wear and in a jiffy too!!